 Pineapple buns are one of my all time favorites as a child, and even now as an adult, I still love them. Growing up, whenever I visited a local bakery I was sure to leave with at least one (if not several) of these delicious buns. Now that I don't live in Taiwan anymore, I definitely don't eat them as much, but there are still times when I just really really want one. A while ago I saw a Taiwanese blog detailing the steps of making it, and I thought, "Hey! It doesn't look that hard!". So I attempted and the results were delicious! Since then, I'll make a batch every now and then and keep them in the freezer for when pineapple bun craving strikes (in reality, we just end up eating them, or I end up giving them away as presents, I love giving food to my friends!). Too bad pineapple buns don't grow on trees (or are sold at whole foods, since that's right across the street), because like all bread recipes, you need a good 6 hours before you get to taste your final products, but well worth the wait! One thing to keep in mind is that the pineapple bun is actually composed of two parts: The bread part and the exterior cookie part. The bread portion of the pineapple bun is partially wrapped in a thin layer of cookie dough and allowed to rise before baking in an oven to produce soft fluffy buns with a slight crispy exterior. Ahhhhh. Need I say more?
INGREDIENTS
Pineapple Bun Bread Dough
Pineapple buns are one of my all time favorites as a child, and even now as an adult, I still love them. Growing up, whenever I visited a local bakery I was sure to leave with at least one (if not several) of these delicious buns. Now that I don't live in Taiwan anymore, I definitely don't eat them as much, but there are still times when I just really really want one. A while ago I saw a Taiwanese blog detailing the steps of making it, and I thought, "Hey! It doesn't look that hard!". So I attempted and the results were delicious! Since then, I'll make a batch every now and then and keep them in the freezer for when pineapple bun craving strikes (in reality, we just end up eating them, or I end up giving them away as presents, I love giving food to my friends!). Too bad pineapple buns don't grow on trees (or are sold at whole foods, since that's right across the street), because like all bread recipes, you need a good 6 hours before you get to taste your final products, but well worth the wait! One thing to keep in mind is that the pineapple bun is actually composed of two parts: The bread part and the exterior cookie part. The bread portion of the pineapple bun is partially wrapped in a thin layer of cookie dough and allowed to rise before baking in an oven to produce soft fluffy buns with a slight crispy exterior. Ahhhhh. Need I say more?
INGREDIENTS
Pineapple Bun Bread Dough
180g Unsweetened soymilk (or milk)
1/2 Tablespoons of Active Yeast
320g Bread Flour
80g Cake Flour
80g White sugar
1/4 tsp salt
16g Dry Milk Powder (ok to omit, but the buns smells more fragrant when you add it)
1 Egg
40g butter (softened at room temperature)
Pineapple Bun Exterior Cookie Dough
ayou can also use granulated sugar. I've tried both. With granulated sugar you get crunchier cookie exterior whereas powdered sugar = softer cookie exterior
blarge egg = ~50g, XL egg ~56g. To determine the weight of egg, beat the yolk and white together first and weigh out amount needed
INSTRUCTIONS
- Bread dough: Add Unsweetened soymilk (or unsweetened milk of your choice), egg, both types of flour, sugar, dry milk powder, salt and yeast to stand mixer bowl. Make sure when you add the salt, add it to the side of the bowl and then add the yeast in another part of the bowl so that the yeast doesn't touch the salt (salt inactivates yeast activity)
- Start by mixing on low speed (1 or 2) until the mix starts to come together. Once the flour is incorporated enough where it won't splatter with the mixing, you can mix on high speed (8 or 9). Once the mix forms a dough, you can add the butter. Keep mixing on high speed for about 10 minutes.
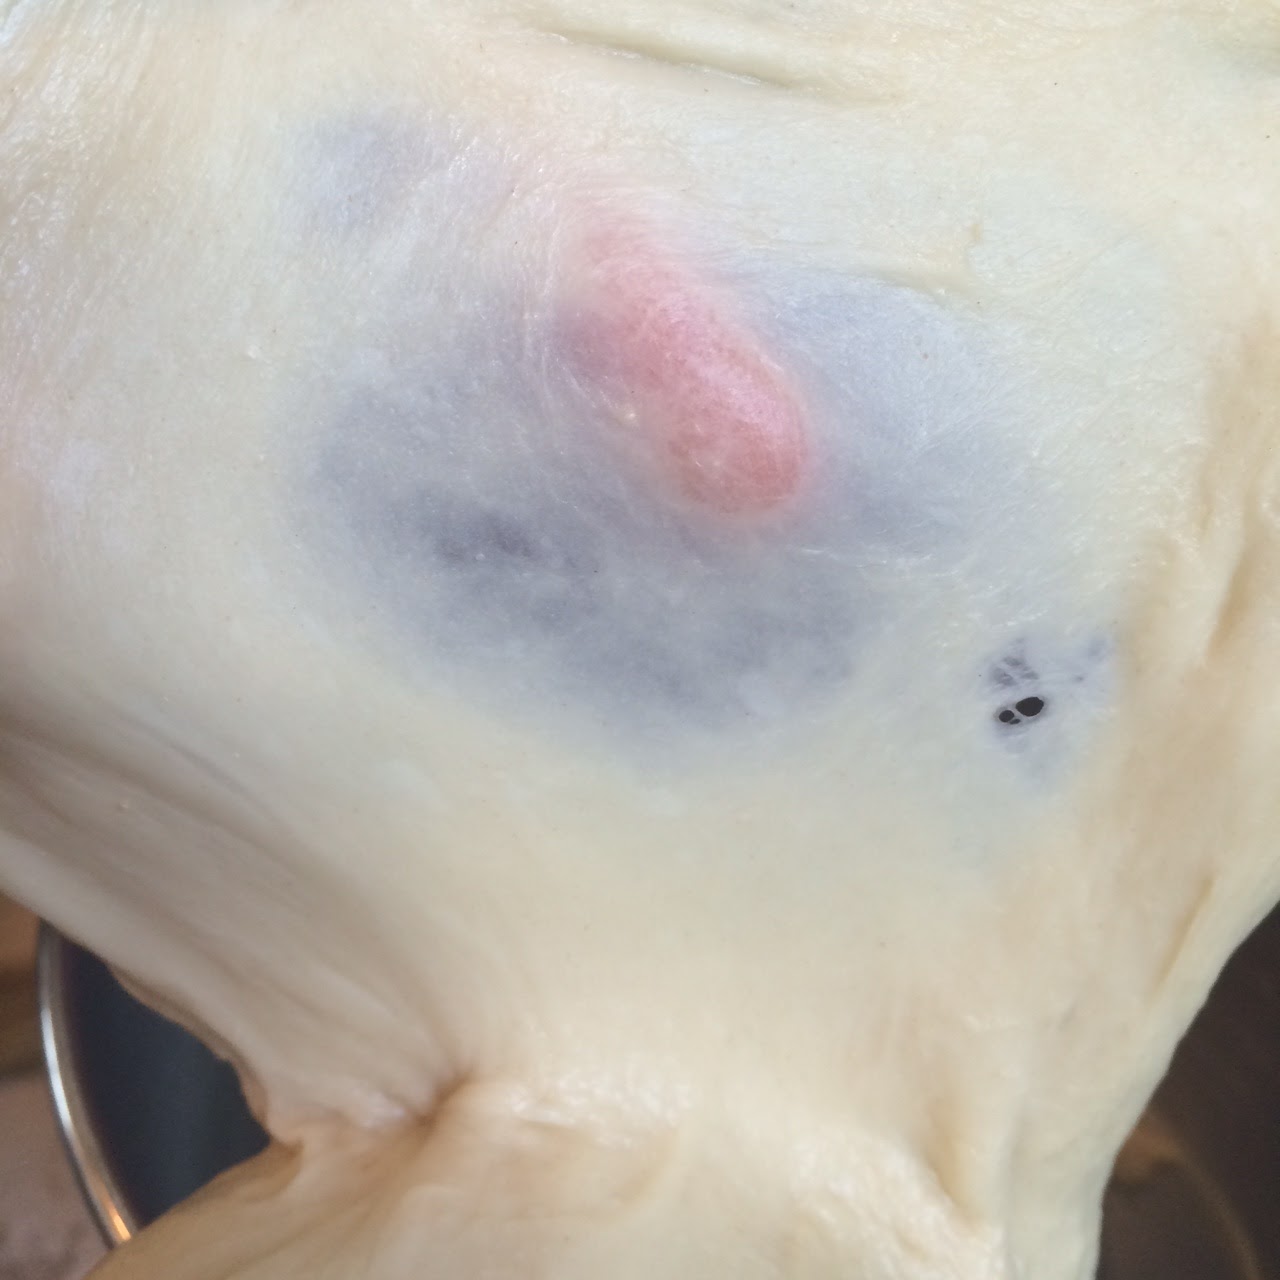
- Once the dough can be stretched out so that it's transparent and doesn't easily tear (and even when it tears the edges of the hole is very smooth), it's ready for the first rising.
- Shape the dough into a smooth ball, place it in a large bowl, cover with cling wrap and allow to rise in a warm placec (~80F) for 2.5 hours.
- Cookie Dough: While waiting for the bread dough portion to rise, make the exterior cookie dough part. Mix all the ingredients of the cookie dough together in a stand mixer, handheld mixer, or by hand.
- Once the cookie dough is thoroughly mixed, shape it into a ball and divide it into 12 equal pieces (about 22g each) and roll each piece into a ball.d
- Place the cookie dough ball onto a piece of cling wrap, place another piece of cling wrap over it, flatten the ball with the palm of your hand, and roll it out with a rolling pin so that the cookie dough is large enough to cover over the ball of bread dough from step 8. The cookie dough should be a flat circle (like a dumpling skin) about 3" in diameter.
- Gently remove the flat and rolled out cookie dough from the cling wrap, place it to the side, and repeat for the other 11 cookie dough balls.
- Assembling Pineapple Bun: After about 2.5 hours, the bread dough should rise to about double it's original volume. Once it's at this stage, gently punch the dough down, give it a few kneads and take it out of the bowl
- Divide the bread dough into 12 pieces (about 60g each) and roll each piece into a ball.
- Place a ball of bread dough in the palm of your hand, and gently lay the flat cookie dough over the bread dough, folding the cookie dough over the bread dough. Repeat for the rest of your bread and cookie dough
- Place each wrapped bread dough on a pan covered with parchment paper or silpat, making sure there's at least 1.5" around each bun (the buns will grow, so you don't want them touching each other)
- Now take a bench knife and first make vertical cuts on the cookie dough portion of the bun, then horizontal cuts. The exterior of your buns will now look like a grid, resembling a pineapple. This is where the name comes from!
- Allow the buns to rise in a warm place for ~60 minutes. I preheat the oven to 400F for 1 minute and stick the buns in there for this final rise. The buns will grow, and cause the squares/diamond shaped of the cookie exterior to separate from each other, making these buns resemble the exterior of a pineapple, hence the name pineapple buns
- Remove the buns from the oven (if that's what you used as the warm environment) and preheat oven to 375F. While waiting for the oven to preheat, prepare an eggwash (take one egg and beat the white and yolk together like you're going to make scrambled egg), and brush the eggwash over each pineapple bun. The eggwash gives the buns a nice shiny exterior. You can sprinkle some granulated sugar over the eggwash as well.
- Bake at 375 for 12 minutes, or until internal temperature of bread reaches 190F. Remove from oven, allow to cool for 5 minutes, and transfer to cooling rack
Storage Method: Store in ziplock bag with all the air pressed out at room temperature for 2 days. Since these breads have no preservatives or bread stabilizers, they tend to dry out rather quickly. If you are not eating right away, the best way to store is to freeze immediately after they have cooled and leave at room temperature to thaw overnight. Before eating, place bread in a microwave-safe container and cover with damp paper towel and microwave for 30s. The microwave method also works well if you stored in ziplock bag at room temperature as well. The buns will almost taste like they just came out of the oven.
cYou can use the oven to rise the dough. Allow oven to preheat at 400F for one minute, and turn it off immediately. The residual warmth of the pre-heated oven is a perfect environment to rise dough.
dYou can also chill the cookie dough balls in the fridge for at least 30 minutes to harden them, making it easier to flatten and roll out later on, however I've found that as long as I roll the dough out between two pieces of cling wrap, it won't stick to the rolling pin or the surface I'm working on.
Bread Dough:


|
| (LEFT to RIGHT) Add all the ingredients (wet first, then dry, with the flour being last) except the yeast to the mixing bowl. When adding the flour, try to add it to the middle of the bowl and make a little crater in the mound of flour with your fingers or the back of a spatula and add the yeast into that crater. Mix on slow speed for (level 2 on stand mixer)1 minute until everything is incorporated and a shaggy mass forms (right) |


|
| Now mix the dough on medium high speed (7 or 8) for about 7 minutes. The dough will appear smooth and will pull away from the sides of the mixing bowl (instead of sticking to the mixing bowl). You know your mixing is done when you can stretch the dough out to form a see-through film and it doesn't tear (pictured). See how the dough appears smooth and you can see my fingers from behind the dough with minimal tearing. |
    |
Form the dough into a ball and place in a large, greased bowl (the bowl should be at least 3x the size of the dough ball as the dough needs room to rise). Cover with cling wrap and allow to rise in a warm place for 2.5 hours. As you can see in the photo, the dough will rise and expand quite a bit. When you poke the dough and it doesn't return to normal (RIGHT), the rise is complete.
|
Cookie Dough:
   |
| While waiting for the dough to rise, measure 140g of cake flour and 60g of powdered sugar. In another mixing bowl (RIGHT) add the rest of the ingredients listed for the cookie dough |


|
| Sift the flour and sugar into the mixing bowl and mix. I've found that using my hand to massage the mixture is the easiest way. Divide the cookie dough into 12 equal pieces (about 22g each) and roll into balls |


(LEFT to RIGHT) Pick up the flat cookie dough sandwiched between two pieces of cling wrap and lay it flat on your hand. Remove the top layer of cling wrap (there will be one more layer of cling wrap between your hand and the flat cookie dough) and gently place the flat cookie dough over the round ball of bread dough. Now carefully remove the remaining cling wrap (which is now on top of the bread dough ball and cookie dough), and gently shape the flat circular cookie dough to cover the bread dough ball. |
 |
| Repeat for all the other buns and place them about 1.5" - 2" spaced apart all around on baking pan. I fit about 6 buns on one pan.
|


|
|
Now take a bench knife and make crisscross indentations. I find that it's easier to make the indentations starting from bottom to top and then from right to left (I'm right handed). You don't need to cut through the entire layer of cookie dough as the rising of the bread dough will cause the cookie dough layer to break open at the places you indented .
|
 |
| Put your pineapple buns in a warm place and allow to rise for ~60 minutes |
 |
| After the second rising, the buns have grown (you can tell by the decrease in spacing between each bun). Also note that the cookie layer has separated at the indentation lines previously made to reveal the whiter bread dough inside. |
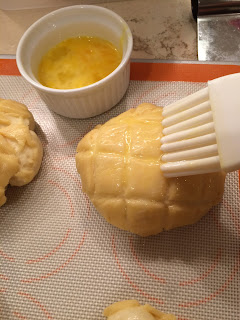 |
| Beat one egg in a small bowl, add 1T of water and gently brush this egg mixture over each bun. This provides the glossy exterior of the baked buns. |
Bake at 375F for 12 minutes, or until internal temperature of bread reaches 190F. Remove from oven, allow to cool for 5 minutes, and transfer to cooling rack. The photos on the right are from a previous batch where I was trying to squeeze as many as I could on a pan. I've found that placing no more than 6 buns on a baking sheet ensures that the buns don't touch each other when they expand. You see how some of my buns have ran into each other.
 |
Fresh, homemade Taiwanese pineapple buns!
|


Comments
Post a Comment