Longan Walnut Artisan Bread Made in Dutch Oven (桂圓核桃麵包)


Longan walnut Bread
INGREDIENTS
- 150g fed sourdough starter1 (I used this recipe)
- 60g dried longan (available at Chinese grocery, otherwise dried cranberries are delicious too!)
- 60g walnut pieces
- 300g bread flour
- 30g white sugar
- 100g red wine (I used Charles Shaw wine from Trader Joes)
- 90g water
- 20g unsalted butter
- 1/2 tsp salt
- 1 tsp instant yeast (I use saf red instant yeast)
- Pour red wine over 60g of dried longan/cranberries until they are all covered. Allow to soak overnight in the fridge.
- Feed sourdough starter (57g unfed sourdough mixed with 100g room temperature water and 100g AP flour) and loosely cover. Leave at room temperature overnight.
- Filter dried longan/cranberries through a mesh, reserving the wine for the bread dough
- Mix wine (use reserved portion from step 2 and add more to make 100g), water, salt, sugar, yeast and bread flour together until dough comes together, about 5 minutes. (I used the dough function on my bread machine)
- Once the dough is combined, add the sourdough starter and mix for another 5 minutes.
- At this point, if the dough feels too wet, add a little more bread flour to adjust and continue mixing after the addition of flour.
- Once the dough appears smooth, add the butter and continue mixing in the bread machine for about 20 minutes.
- Remove the dough onto a floured surface and roll the dough into a flat rectangle.
- Sprinkle the walnut pieces and dried longan/cranberries evenly over the dough and roll the dough into a log, starting from the top.
- Fold the dough log in half (from left to right) and gently shape into a sphere.
- Place dough into an oiled bowl (I used the bread machine's mixing bowl), cover with a plastic wrap and allow the dough to rise in a warm place for 90-120 minutes (until the dough doubles in size)
- Once the dough has doubled in size, gently knead the dough again and reshape into a sphere. Allow to rest for 20 minutes
- Again, knead the dough into a sphere and place into a pre-oiled round wire basket, seam side up. Allow to rise in a warm place for 1-2 hours. You can also place the dough into a large bowl covered with a linen cloth that's been sprinkled liberally with flour2.
- Once the dough has pretty much filled the entire basket, invert onto a parchment paper (so that the seam side is facing down) and generously sprinkle the top with flour.
- Score top of bread with a lame or sharp knife to the design of your liking3.
- Gently transfer the parchment paper with the bread into a dutch oven. Cover with lid and send into a cold oven and start preheating to 450F. Set timer for 35 minutes.
- After 35 minutes, remove the lid and continue baking for 15-25 minutes4. Baking for 15 minutes after lid removal yields a much softer crust compared to baking for 25 minutes, depending on your preference.
- To store: Bread is best consumed the day of, but can be stored at room temperature for up to two days. Otherwise, it's best to freeze the portion you are not going to eat, and either let it thaw out at room temperature or toast in oven prior to eating. When storing at room temperature, place in a zip lock bag with all the air pushed out to retain maximum freshness.
- If you don't own any sourdough starter, you could also make a poolish the night before: mix 75g water with 75 bread flour, a pinch of salt and 1/16 tsp of yeast. Allow to rise until double the size at room temperature, and refrigerate overnight. The original recipe uses this method.
- King Arthur Bread website has amazing tips about the use of a linen lined bowl.
- Great video on King Arthur Bread website about how to slash bread.
- I followed the dutch oven, cold start bake method from King Arthur Bread website.


|
| Left: Active and fed sourdough, see the bubbles of the sourdough starter. One way to test if the starter is ready is to drop a small piece into a cup of water. If the sourdough piece floats, it is ready. Next, drain the presoaked longan/cranberries, using the reserved wine for bread. Add wine, water, sugar, salt, breadflour to bread machine mixing bowl. Make a little indentation in the flour mound and add the instant yeast (middle). Mix for about 5 minutes until a dough comes together. At this point the dough will appear a bit dry and should cleanly detach from the side of the mixing bowl (picture on right) |


|
| Add 150g sourdough starter to the dough and mix for another 5 minutes. The dough will become much more wet, sticking to the bottom and sides of the bowl. Add more flour if necessary so that most of the dough comes together (instead of being stuck to the bottom). Once the dough becomes smooth and shiny, add the butter (I cut mine into little chunks). Continue mixing for 20 minutes. |


|
| Generously flour/oil a working surface (I floured a slipat liner) and roll out the dough into a rectangle about 9" x 14" wide. Evenly spread the walnuts and longan/cranberries over the surface and roll the dough into a log starting from the top and rolling towards you. |


|
| Roll dough into a ball: Place dough seam side down and fold left 1/3 of the dough into the middle, then the right 1/3 of the dough over the middle. Flip dough over into your palms and gently pat into a ball. Place dough in mixing bowl and allow to rise in a warm place for 1-2 hours. I place mine back in the bread machine, close the lid and just let it rise in there. At the end of the rising, the dough would have doubled in size. Noted how the bread on the bottom right has risen to fill the bowl compared to the one on the bottom left. |


|
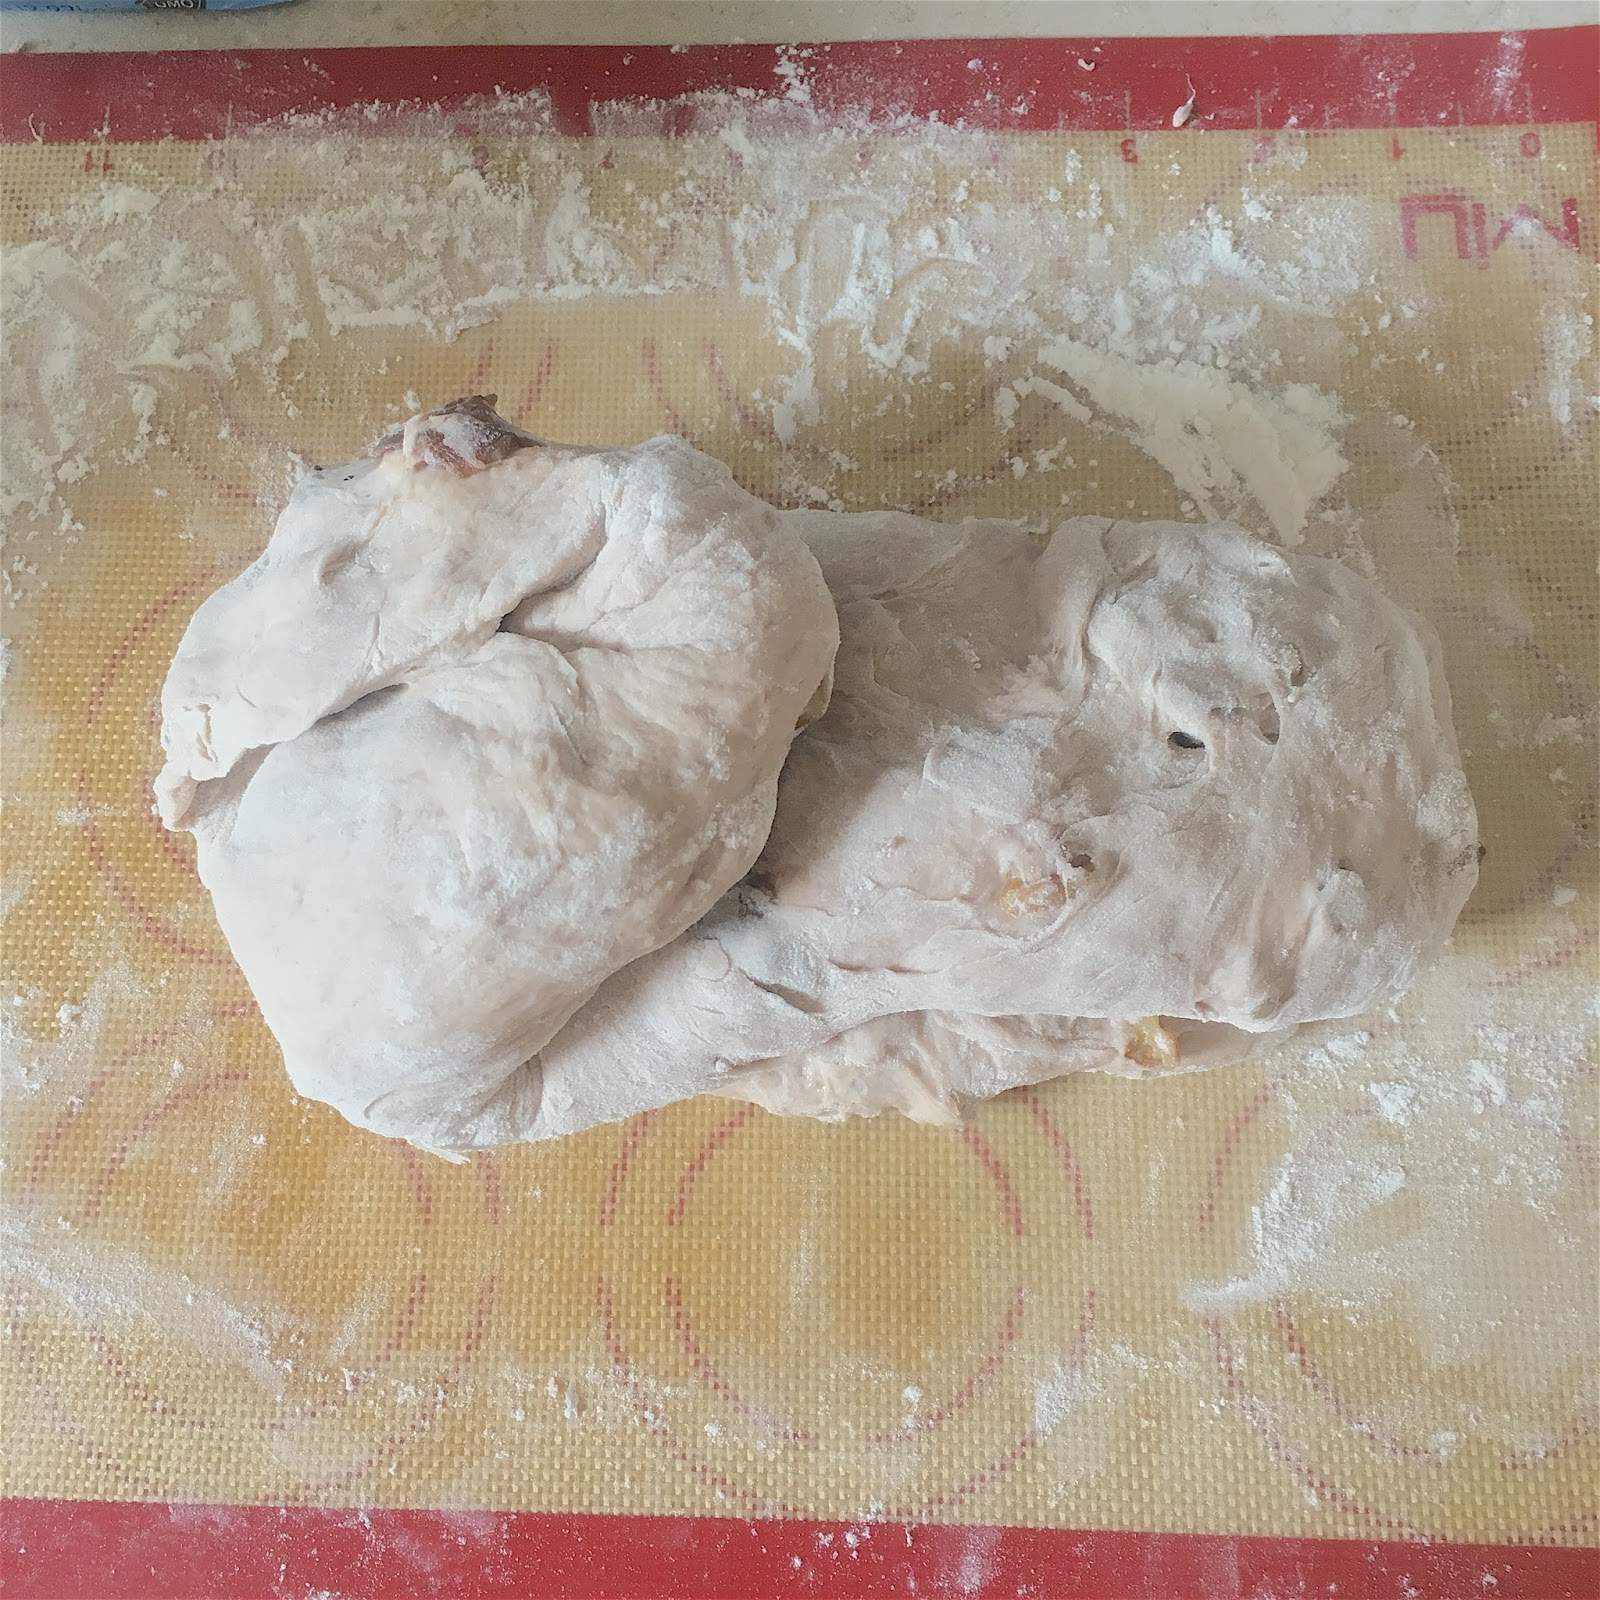
| Rolling dough into a ball: After dough has doubled in size, remove from the bowl onto a floured surface and roll into a ball. I do this by using the heel of my hand to press into the dough to shape it into rectangle roughly 9"x6". Then fold the dough in three by folding the top third of the dough down, then folding the bottom third of the dough up. This forms a rectangular strip about 9" x 2". Next, fold the dough on the left third and then the right third as in the previous photos, flip over and pat into a ball in the palms of your hands. |


|
| Cover the dough with plastic wrap and allow to rest for 20 minutes. Next, oil a metal basket and invert the dough onto it, seam side up. Allow to rise for 1-2 hours, until the dough has doubled in size (see how the dough pretty much fills the entire diameter of the basket, on the right). You can also allow the dough to rise in a bowl covered with a floured linen cloth. |


|
| Flip the bread over from the wire basket onto a piece of parchment paper. Liberally sprinkle some flour over the top and then score the dough. Gently transfer the dough with the parchment paper and place in a cold dutch oven. |

|
| Place lid over dutch oven and send into cold oven. Next, turn oven on to 450F and set timer for 35 minutes. Once the timer beeps, remove the lid and continue baking for 20-25 minutes , depending on how hard you like the crust. 20 minutes yields a softer crust while 25 minutes yields a harder crust. Pictured left is the bread right when the lid is removed (after 35 minutes of initial baking), and pictured right is the final product. Note the caramelization of the crust (golden brown hue). Remove bread with parchment from dutch oven and allow to cool completely on a wire rack. |

|
| Another loaf made with vertical slashing and baked in an enameled dutch oven. |
 |
| Cross section. Enjoy fresh with some butter and a cup of tea! |


Beautiful! I really wanted to try this at Wu Pao Chun last time I visited Taipei but never got the chance. Not sure how a DIY version will compare, but I'm totally giving it a shot.
ReplyDeleteThe Wu Pao Chun version is BEYOND amazing...once you slice open the bread the rose and lychee aroma just hits you. I actually looked over the recipe from his bread book...it is another level of baking, he dries his own longan for two weeks also makes his own rose paste and I believe he brought that to the competition. The DIY version is a much more elementary version, but the result is quite good, but you can't really compare with how fragrant his champion bread is. Let me know how yours turn out!
Delete